iOS Game Development with Tauri + PixiJS: From Web Tech to App Store
A complete guide to developing iOS games using Tauri 2.x and PixiJS 8, from environment setup to App Store deployment, with real project code examples.
Overview
What options do web developers have when they want to build an iOS app? Should they learn React Native, Flutter, or native Swift?
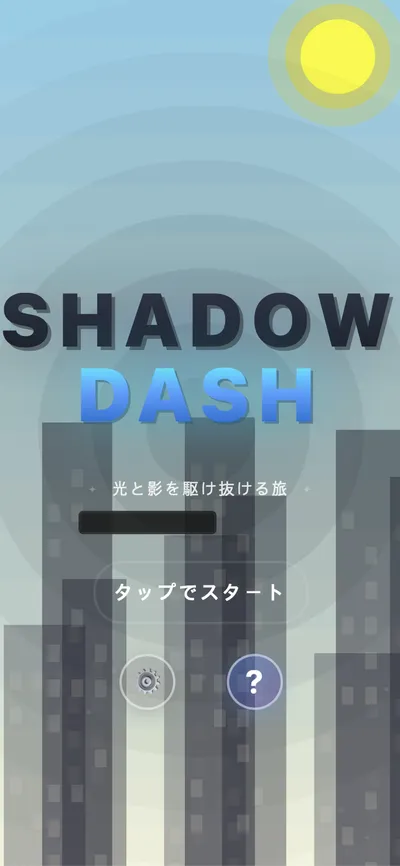
In this article, I share my experience developing an iOS game using Tauri 2.x + PixiJS + SvelteKit and publishing it to the App Store. Based on the actual code from Shadow Dash, I’ll cover the entire process from environment setup to App Store submission.
🎮 Shadow Dash Details: Check out the portfolio page for the game’s core mechanics, tech stack, and screenshots.
Technology Stack Selection
Why Tauri + PixiJS?
| Technology | Role | Advantages |
|---|---|---|
| PixiJS 8 | 2D Rendering Engine | WebGL-based high performance, lightweight, flexible |
| SvelteKit | Frontend Framework | Fast builds, small bundles, Svelte 5 runes |
| Tauri 2.x | Native Wrapper | Lighter than Electron, iOS/Android support |
| TypeScript | Development Language | Type safety, IDE support |
PixiJS vs Phaser
Two commonly compared libraries for game development:
| Aspect | PixiJS | Phaser |
|---|---|---|
| Purpose | Pure rendering engine | Full game framework |
| Bundle Size | ~300KB | ~1MB |
| Flexibility | High (DIY implementation) | Medium (framework rules) |
| Learning Curve | Medium | Low |
| Recommended For | Custom game logic | Rapid prototyping |
Why PixiJS was chosen for Shadow Dash:
- Easy implementation of custom visual effects like day/night transitions
- Natural integration with SvelteKit
- Smaller bundle size for mobile optimization
AI-Friendly Game Genres
Recommended genres for first projects:
| Rank | Genre | Dev Difficulty | AI Utility | Revenue Potential |
|---|---|---|---|---|
| 1 | Tap Reaction (Flappy Bird-style) | ⭐ | ★★★ | ★★ |
| 2 | Word/Quiz | ⭐⭐ | ★★★★★ | ★★★ |
| 3 | 2048-style | ⭐⭐ | ★★★★ | ★★ |
| 4 | Idle/Incremental | ⭐⭐ | ★★★★ | ★★★★ |
Why tap reaction games are recommended:
- Minimal code required (under 500 lines possible)
- Simple and clear game logic
- Easy to create series with skin/theme variations
- Perfect for learning the complete development pipeline
Development Environment Setup
Required Tools Installation
# Node.js (v18+)
node --version

# Install Rust
curl --proto '=https' --tlsv1.2 -sSf https://sh.rustup.rs | sh
source "$HOME/.cargo/env"

# Add iOS targets
rustup target add aarch64-apple-ios
rustup target add aarch64-apple-ios-sim

# Xcode Command Line Tools
xcode-select --install
Homebrew Packages (macOS)
brew install cocoapodsProject Initialization
# Create SvelteKit project
npx sv create my-game
cd my-game

# Install PixiJS
bun add pixi.js

# Initialize Tauri
bun add -D @tauri-apps/cli
bunx tauri init

# Initialize iOS
bunx tauri ios init
SvelteKit Configuration (for Tauri)
Since Tauri operates without a Node.js server, you need to configure the static adapter for SPA mode.
svelte.config.js:
import adapter from '@sveltejs/adapter-static';

export default {
  kit: {
    adapter: adapter({
      fallback: 'index.html'
    }),
    prerender: {
      entries: []
    }
  }
};src/routes/+layout.ts:
export const prerender = true;
export const ssr = false;
Game Architecture
Let’s examine the core structure of Shadow Dash.
Project Structure
src/
├── lib/
│   ├── game/
│   │   ├── core/           # Game, GameLoop, GameState
│   │   ├── systems/        # TimeCycle, Platform, Collision
│   │   ├── entities/       # Player, Platform
│   │   ├── managers/       # Score, Audio, Input
│   │   ├── rendering/      # Background, Transition, Particle
│   │   └── config/         # constants, colors
│   ├── components/         # Svelte components
│   └── tauri/              # Tauri command wrappers
├── routes/                 # SvelteKit routes
└── app.html

src-tauri/
├── src/
│   └── lib.rs              # Tauri commands (save, haptics)
└── tauri.conf.json
Core Game Class: Game.ts
The main game class initializes the PixiJS Application and connects all systems.
import { Application, Container } from 'pixi.js';
import { EventEmitter } from 'eventemitter3';

export class Game extends EventEmitter<GameEvents> {
  private app: Application | null = null;
  private gameLoop: GameLoop | null = null;

  // Core systems
  public gameState: GameState;
  public timeCycle: TimeCycleManager;
  public scoreManager: ScoreManager;

  constructor() {
    super();
    this.gameState = new GameState();
    this.timeCycle = new TimeCycleManager();
    this.scoreManager = new ScoreManager();
    this.setupEventListeners();
  }

  async init(canvas: HTMLCanvasElement): Promise<void> {
    this.app = new Application();

    await this.app.init({
      canvas,
      width: SCREEN.WIDTH,
      height: SCREEN.HEIGHT,
      backgroundColor: 0x87CEEB,
      resolution: window.devicePixelRatio || 1,
      autoDensity: true,
      antialias: true,
    });

    // Create layered containers
    this.backgroundContainer = new Container();
    this.gameContainer = new Container();
    this.effectContainer = new Container();
    this.uiContainer = new Container();

    this.app.stage.addChild(this.backgroundContainer);
    this.app.stage.addChild(this.gameContainer);
    this.app.stage.addChild(this.effectContainer);
    this.app.stage.addChild(this.uiContainer);

    // Initialize systems...
    this.emit('ready');
  }
}
Key Points:
- Layered Containers: Separate background, game objects, effects, and UI for render order management
- Event-Based: Loose coupling between components using EventEmitter3
- Async Initialization: PixiJS 8 uses the async init() pattern
Day/Night Transition System: TimeCycleManager.ts
The core mechanic of Shadow Dash—the day/night transition system.
export type TimeState = 'day' | 'night' | 'toNight' | 'toDay';

export class TimeCycleManager extends EventEmitter<TimeCycleEvents> {
  private state: TimeState = 'day';
  private timer: number = 0;
  private _transitionProgress: number = 0;

  // Shadow is valid during day or transitions
  isShadowValid(): boolean {
    return this.state === 'day' || this.isTransitioning;
  }

  // Light is valid during night or transitions
  isLightValid(): boolean {
    return this.state === 'night' || this.isTransitioning;
  }

  update(deltaMs: number): void {
    if (this.isPaused) return;
    this.timer += deltaMs;

    if (this.isTransitioning) {
      this._transitionProgress = Math.min(
        this.timer / TIME_CYCLE.TRANSITION_DURATION,
        1
      );
      this.emit('transitionProgress', this._transitionProgress);
    }

    if (this.timer >= this.currentDuration) {
      this.advanceState();
    }
  }

  private advanceState(): void {
    this.timer = 0;
    switch (this.state) {
      case 'day':
        this.state = 'toNight';
        this.emit('transitionStart', 'day', 'night');
        break;
      case 'toNight':
        this.state = 'night';
        this.emit('transitionEnd', 'night');
        break;
      // ... night to day
    }
  }
}
Player System: Player.ts
Rendering procedural characters using PixiJS Graphics.
export class Player {
  public container: Container;
  private graphics: Graphics;

  private velocityY: number = 0;
  private _isGrounded: boolean = false;

  // Squash and stretch animation
  private scaleX: number = 1;
  private scaleY: number = 1;

  jump(): void {
    if (this._isGrounded || this.coyoteTimer > 0) {
      this.velocityY = PHYSICS.JUMP_FORCE;
      this._isGrounded = false;
      this.setState('jump');
    }
  }

  update(deltaTime: number): void {
    // Apply gravity
    if (!this._isGrounded) {
      this.velocityY += PHYSICS.GRAVITY * deltaTime;
      this.velocityY = Math.min(this.velocityY, PHYSICS.MAX_FALL_SPEED);
      this.y += this.velocityY * deltaTime;
    }

    // Squash and stretch interpolation
    this.scaleX += (this.targetScaleX - this.scaleX) * 0.3;
    this.scaleY += (this.targetScaleY - this.scaleY) * 0.3;
  }
}
Game Physics Constants:
export const PHYSICS = {
  GRAVITY: 0.6,
  JUMP_FORCE: -14,
  MAX_FALL_SPEED: 18,
  COYOTE_TIME: 100,      // ms - Jump allowed time after leaving platform
  JUMP_BUFFER: 100,      // ms - Pre-jump input buffer time
} as const;
10-Level Difficulty System
Game difficulty progressively increases based on score.
export const DIFFICULTY = {
  THRESHOLDS: [
    // Onboarding phase (0-499 points)
    { score: 0, cycleDuration: 5000, speed: 2.8, name: 'tutorial' },
    { score: 100, cycleDuration: 4500, speed: 3.0, name: 'beginner' },
    { score: 300, cycleDuration: 4000, speed: 3.3, name: 'novice' },

    // Growth phase (500-2999 points)
    { score: 500, cycleDuration: 3700, speed: 3.3, name: 'intermediate' },
    { score: 1000, cycleDuration: 3400, speed: 3.7, name: 'skilled' },
    { score: 1500, cycleDuration: 3100, speed: 4.0, name: 'advanced' },
    { score: 2000, cycleDuration: 2800, speed: 4.5, name: 'expert' },

    // Mastery phase (3000+ points)
    { score: 3000, cycleDuration: 2500, speed: 5.0, name: 'master' },
    { score: 5000, cycleDuration: 2200, speed: 5.5, name: 'grandmaster' },
    { score: 8000, cycleDuration: 2000, speed: 6.0, name: 'legend' },
  ],
} as const;
Troubleshooting: Environment Setup Errors
Bun and Tauri CLI Compatibility Issues
Error:
Cannot find native binding. npm has a bug related to optional dependenciesCause: Bun doesn’t properly handle Tauri CLI’s optional dependencies
Solution:
# Switch to npm
rm -rf node_modules bun.lockb
npm install
npm run tauri dev
Rosetta Mode Conflict (Apple Silicon Mac)
Error:
Error: Cannot install under Rosetta 2 in ARM default prefix (/opt/homebrew)!Solution:
- Terminal app → Get Info → Uncheck “Open using Rosetta”
- Restart terminal
- Verify:
archcommand → should outputarm64
Rust/Cargo Installation Error
Error:
failed to run 'cargo metadata' command: No such file or directorySolution:
curl --proto '=https' --tlsv1.2 -sSf https://sh.rustup.rs | sh
source "$HOME/.cargo/env"
cargo --version
iOS Development Build
Running the Simulator
bun tauri ios devVite Server Configuration
For real device testing, you need to allow access from all IPs.
vite.config.ts:
export default defineConfig({
  server: {
    host: '0.0.0.0',  // Allow access from all IPs
    port: 1420,
    strictPort: true,
  },
});
Real Device Testing
Apple Developer Account Setup:
- Apple Developer account ($99/year) or free Apple ID (7-day limit)
Team ID Configuration (src-tauri/tauri.conf.json):
{
  "bundle": {
    "iOS": {
      "developmentTeam": "YOUR_TEAM_ID"
    }
  }
}
Run on device:
bun tauri ios dev --deviceApp Store Deployment
Production Build
bun tauri ios buildArchive in Xcode
# Open Xcode project
open src-tauri/gen/apple/*.xcodeproj- Destination: Select Any iOS Device (arm64)
- Product → Archive
- After archive completes, click Distribute App in Organizer window
- Select App Store Connect → Upload
Build Rust Code Script Modification
Modify the Build Phases → Build Rust Code script to prevent archive errors:
export PATH="$HOME/.nvm/versions/node/v22.22.0/bin:$HOME/.cargo/bin:/usr/local/bin:$PATH"

# Skip for archive mode
if [ "$ACTION" = "install" ] || [ "$ACTION" = "archive" ]; then
    echo "Skipping Rust build for archive"
    exit 0
fi

bun run -- tauri ios xcode-script -v --platform ${PLATFORM_DISPLAY_NAME:?} --sdk-root ${SDKROOT:?} --framework-search-paths "${FRAMEWORK_SEARCH_PATHS:?}" --header-search-paths "${HEADER_SEARCH_PATHS:?}" --gcc-preprocessor-definitions "${GCC_PREPROCESSOR_DEFINITIONS:-}" --configuration ${CONFIGURATION:?} ${FORCE_COLOR} ${ARCHS:?}
App Store Connect Configuration
Required Information:
- App name, subtitle (30 characters each)
- Description (4000 characters)
- Keywords (100 characters, comma-separated)
- Screenshots (6.7”, 6.5”, 5.5” required)
- Privacy policy URL
- Support URL
Taking Screenshots
# Clean up status bar in simulator
xcrun simctl status_bar booted override --time "9:41"
xcrun simctl status_bar booted override --batteryLevel 100 --batteryState charged
Required Screenshot Sizes:
| Device | Resolution |
|---|---|
| 6.7” (iPhone 16 Pro Max) | 1320 × 2868 |
| 6.5” (iPhone 15 Plus) | 1290 × 2796 |
| 5.5” (iPhone 8 Plus) | 1242 × 2208 |

Common Errors and Solutions
| Error | Cause | Solution |
|---|---|---|
Cannot find native binding | Bun compatibility | Use npm |
Cannot install under Rosetta 2 | Terminal Rosetta mode | Disable Rosetta |
cargo: command not found | Rust not installed | Install Rust |
Device isn't registered | Device not registered | Register in Xcode |
Connection refused | Network issue | Set Vite host, check firewall |
npm: command not found (Xcode) | PATH issue | Add symlinks |
When Xcode can’t find npm/cargo:
sudo ln -s $(which bun) /usr/local/bin/bun
sudo ln -s $(which node) /usr/local/bin/node
sudo ln -s ~/.cargo/bin/cargo /usr/local/bin/cargo
Command Summary
# Development (simulator)
bun tauri ios dev

# Development (real device)
bun tauri ios dev --device

# Production build
bun tauri ios build

# Open Xcode
open src-tauri/gen/apple/*.xcodeproj

# List simulators
xcrun simctl list devices available | grep iPhone

# Add iOS targets
rustup target add aarch64-apple-ios
rustup target add aarch64-apple-ios-sim
Conclusion
Developing iOS apps with Tauri 2.x + PixiJS + SvelteKit is an attractive option for web developers.
Key Takeaways:
- SvelteKit + PixiJS - Lightweight and fast game development
- Tauri 2.x - Native performance with small bundle size
- Terminal builds - More stable than direct Xcode builds
- Build Script modification - Prevents archive errors
Once you successfully deploy your first app, the second one becomes much easier!
Download Shadow Dash
Try Shadow Dash, the game built with the technologies covered in this article!

Feedback is welcome! If you find any bugs or have suggestions after playing, please let me know via App Store review or email.
📱 Shadow Dash Details: Check out the portfolio page for core game mechanics and more screenshots.
References
Was this helpful?
Your support helps me create better content. Buy me a coffee.
Related Articles
-
Individual Developer's AI SaaS Journey: Production Launch in 3 Days
Personal developer's AI SaaS development journey, sharing web tech-based app development experiences

-
Automating Large-Scale Website Page Generation with Claude Code: Parts Library and SubAgent Parallel Processing
Web automation with Claude Code helps streamline development workflows

-
Automate Web Performance Optimization with Chrome DevTools MCP
Performance analysis with Chrome DevTools MCP can be applied to game optimization