EffiFlow 第二部分:Skills 自动发现与 58% Token 节省缓存
深度解析Claude Code的Skills自动发现机制及Commands集成方法,分步说明实现过程。分享EffiFlow博客自动化系统通过提示缓存策略将Token成本降低58%的完整实现过程与数据验证结果。
系列导读
EffiFlow 自动化架构分析/评估及改进系列 (2/3)
- 第一部分:通过元数据实现 71% 成本节省 - 三层架构与整体系统概述
- 第二部分:Skills 与 Commands 集成策略 ← 当前文章
- 第三部分:实战改进案例与 ROI 分析
引言
在第一部分中,我们探讨了 EffiFlow 的三层架构(Agents → Skills → Commands)以及通过元数据优先策略实现 71% 成本节省。在第二部分中,我们将深入分析该系统的核心——Skills 的自动发现机制和Commands 的编排模式。
核心问题如下:“Model-Invoked 和 User-Invoked 的区别是什么,如何实现 58% 的 Token 节省?”
Skills:可自动发现的模块化功能
什么是 Model-Invoked?
Skills 以Model-Invoked方式运行。这意味着即使用户没有明确调用,Claude 也会根据上下文自动激活。
例如,当用户提到”blog post”或”frontmatter”等关键词时,Claude 会自动加载 blog-writing Skill。这就像专家听到对话主题后自动拿出相关工具一样。
SKILL.md 结构分析
所有 Skill 都通过包含 YAML frontmatter 的 SKILL.md 文件定义:
---
name: blog-writing
description: Create SEO-optimized multi-language blog posts with proper frontmatter, hero images, and content structure. Use when writing blog posts, creating content, or managing blog metadata.
allowed-tools: [Read, Write, Edit, Bash, Grep, Glob]
---核心要素:
- name: 小写字母,使用连字符,不超过 64 个字符
- description: 功能描述 + 使用时机(“Use when…”)
- allowed-tools: 通过工具限制增强安全性,可实现只读 Skills
description 中的”Use when…”语句尤其重要。Claude 通过这个语句判断何时应该激活 Skill。
已实现的 4 个 Skills 详解
1. blog-writing (666 行)
文件结构:
- SKILL.md (73 行): 核心概述
- content-structure.md (328 行): 文章结构指南
- frontmatter-schema.md (173 行): 模式详细说明
- seo-guidelines.md (92 行): SEO 优化规则
- 3 个 Python 脚本 (464 行): generate_slug.py, get_next_pubdate.py, validate_frontmatter.py
核心功能:
- Frontmatter 验证(日期格式、必填字段、图片路径)
- SEO 优化(各语言的标题/描述长度限制)
- 韩语: title 40 字符, description 120 字符
- 英语: title 60 字符, description 160 字符
- 日语: title 35 字符, description 110 字符
- 多语言支持(韩语、英语、日语)
- Slug 自动生成和 pubDate 计算
2. content-analyzer (275 行)
输出元数据:
{
  "summary": "100-150字摘要",
  "topics": ["主题1", "主题2", "主题3", "主题4", "主题5"],
  "techStack": ["技术1", "技术2", "技术3"],
  "difficulty": 3,
  "categoryScores": {
    "automation": 0.8,
    "web-development": 0.6,
    "ai-ml": 0.9,
    "devops": 0.3,
    "architecture": 0.5
  },
  "contentHash": "abc123..."
}
Token 效率:
- 完整内容分析: ~40,000 tokens
- 基于元数据: ~12,000-16,000 tokens
- 节省 60〜70%
增量处理: 通过 Content Hash 检测变化,避免不必要的重新分析
3. recommendation-generator (341 行)
基于 LLM 的语义推荐:
与传统的 TF-IDF 方法不同,使用 Claude LLM 实现真正的语义理解:
TF-IDF (传统)         →  LLM (现代)
关键词频率计算         →  全面内容理解
余弦相似度            →  语义相似性
基于关键词重复 → 基于上下文推荐六维相似度分析:
- topic: 主题相似性 (40%)
- techStack: 技术栈 (25%)
- purpose: 目的对齐 (10%)
- complementary: 互补关系 (10%)
- difficulty: 难度 (15%)
- category: 类别对齐
多语言推理:
{
  "reason": {
    "ko": "두 글 모두 MCP 서버를 활용한 브라우저 자동화...",
    "ja": "両記事ともMCPサーバーを活用した...",
    "en": "Both posts cover MCP server-based...",
    "zh": "两篇文章都涵盖基于 MCP 服务器的..."
  }
}
4. trend-analyzer (605 行)
Brave Search MCP 集成:
# 每次搜索后必须延迟 2 秒(遵守速率限制)
brave_web_search "AI automation tools 2025"
sleep 2
brave_web_search "Claude Code trends 2025"
sleep 2缓存策略:
| 数据类型 | 缓存周期 | 文件位置 | 效果 |
|---|---|---|---|
| 趋势数据 | 24小时 | .cache/trend-data.json | 防止同日重复搜索 |
| 技术数据 | 7天 | .cache/technology-data.json | 每周去重 |
| 关键词数据 | 48小时 | .cache/keyword-data.json | 2天内重用 |
性能对比:
Before (缓存前):
- 每次调用 Brave Search
- 40,000+ tokens
- 成本: ~$0.05/次
After (缓存后):
- 24小时内重用缓存
- 17,000 tokens
- 成本: ~$0.02/次
- 节省 58%
Progressive Disclosure 模式
Skills 采用分层上下文提供方式:
graph TD
    A[SKILL.md<br/>核心概述<br/>73-605行] --> B[支持文档<br/>详细指南<br/>92-328行]
    B --> C[脚本<br/>可执行代码<br/>78-258行]

    style A fill:#10B981,stroke:#059669,stroke-width:2px,color:#fff
    style B fill:#3B82F6,stroke:#2563EB,stroke-width:2px,color:#fff
style C fill:#F59E0B,stroke:#D97706,stroke-width:2px,color:#fff效果: 按需加载,最大化上下文效率
Commands:用户调用的工作流编排器
什么是 User-Invoked?
Commands 以User-Invoked方式运行。用户使用 /command 斜杠明确调用,并可通过 $ARGUMENTS 传递参数。
/write-post "Claude Code MCP 集成指南"
/analyze-posts --force
/next-post-recommendation --count 10
复杂度分布
| 复杂度 | Commands | 平均行数 |
|---|---|---|
| Very High | write-post (1,080行), write-post-ko (1,063行), write-ga-post (745行) | 963 行 |
| High | analyze-posts (444行), generate-recommendations (514行), next-post-recommendation (551行) | 503 行 |
| Low | commit (11行) | 11 行 |
Phase-Based Execution 模式
复杂的 Commands 划分为清晰的 Phase。让我们看看 write-post 的 8 个 Phases:
sequenceDiagram
    participant U as User
    participant C as Command<br/>(write-post)
    participant WR as Web Researcher<br/>Agent
    participant TA as Trend Analyzer<br/>Skill
    participant BS as Brave Search<br/>MCP
    participant IG as Image Generator<br/>Agent
    participant WA as Writing Assistant<br/>Agent
    participant BW as Blog Writing<br/>Skill
    participant PA as Post Analyzer<br/>Agent
    participant CA as Content Analyzer<br/>Skill

    U->>C: /write-post "主题"

    Note over C: Phase 1: Research & Planning
    C->>WR: 研究请求
    WR->>TA: 趋势分析(自动发现)
    TA->>BS: 网络搜索
    BS-->>TA: 搜索结果
    Note over TA: sleep 2 (速率限制)
    TA-->>WR: 趋势数据
    WR-->>C: 研究完成

    Note over C: Phase 2: Image Generation
    C->>IG: 图片生成请求
    IG-->>C: Hero 图片

    Note over C: Phase 3: Content Writing
    C->>WA: 内容写作请求
    WA->>BW: 博客写作(自动发现)
    BW-->>WA: 多语言文章
    WA-->>C: 写作完成

    Note over C: Phase 4: Frontmatter & Metadata
    C->>BW: Frontmatter 验证
    BW-->>C: 验证完成

    Note over C: Phase 5: Metadata Generation
    C->>PA: 元数据提取
    PA->>CA: 内容分析(自动)
    CA-->>PA: 元数据
    PA-->>C: post-metadata.json

    Note over C: Phase 6-8: Recommendations, Backlinks, Build
    C->>C: V3 推荐生成
    C->>C: 反向链接更新
    C->>C: astro check & build

    C-->>U: 文章生成完成
Phase 详细内容:
Phase 1: Research & Planning
- 调用 Web Researcher 代理
- 自动发现 Trend Analyzer Skill
- 通过 Brave Search MCP 收集最新信息
- 2秒延迟遵守速率限制
Phase 2: Image Generation
- Image Generator 代理
- 使用 Gemini API(需要 GEMINI_API_KEY)
- 基于主题生成 Hero 图片
Phase 3: Content Writing
- Writing Assistant 代理
- 自动发现 Blog Writing Skill
- 同时创建韩语、日语、英语版本
- 本地化(非翻译)
Phase 4: Frontmatter & Metadata
- 使用 Blog Writing Skill 验证 Frontmatter
- pubDate: ‘YYYY-MM-DD’ 格式(单引号)
- heroImage: 相对路径验证
Phase 5: Metadata Generation
- Post Analyzer 代理
- 自动激活 Content Analyzer Skill
- 计算 difficulty (1-5) 和 categoryScores
Phase 6: V3 Recommendations
- 执行 scripts/generate-recommendations-v3.js
- 基于元数据计算相似度
- 选择前 5 篇相关文章
Phase 7: Backlink Updates
- Backlink Manager 代理(可选)
- 相关文章互联
Phase 8: Validation & Build
- npm run astro check
- npm run build
- 返回文件路径和元数据摘要
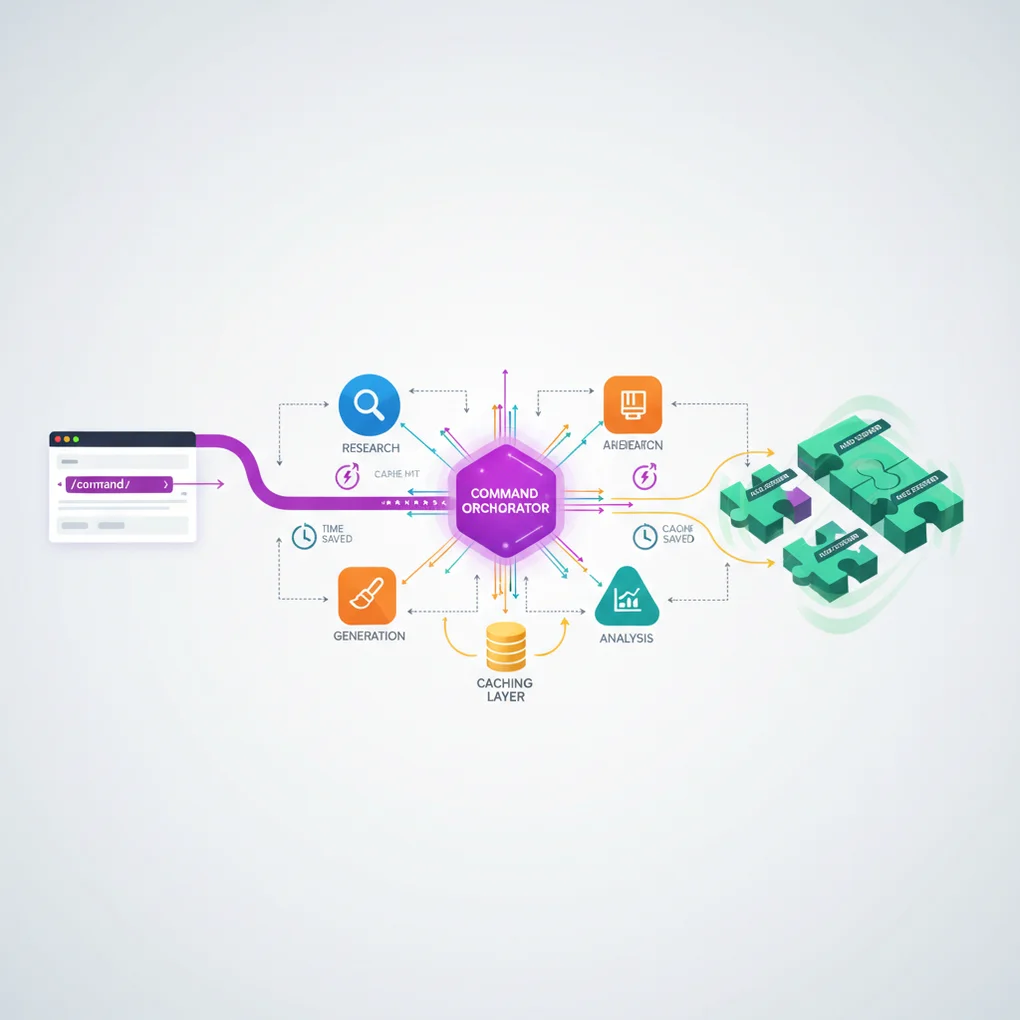
Agent Orchestration 模式
Commands 充当编排器角色,实际工作委派给 Agents:
graph LR
    CMD[Command<br/>Orchestrator] --> WR[Web Researcher<br/>Agent]
    CMD --> IG[Image Generator<br/>Agent]
    CMD --> WA[Writing Assistant<br/>Agent]
    CMD --> PA[Post Analyzer<br/>Agent]
    CMD --> BM[Backlink Manager<br/>Agent]

    WR -.自动发现.-> TA[Trend Analyzer<br/>Skill]
    WA -.自动发现.-> BW[Blog Writing<br/>Skill]
    PA -.自动发现.-> CA[Content Analyzer<br/>Skill]

    style CMD fill:#8B5CF6,stroke:#7C3AED,stroke-width:3px,color:#fff
    style WR fill:#3B82F6,stroke:#2563EB,stroke-width:2px,color:#fff
    style IG fill:#F97316,stroke:#EA580C,stroke-width:2px,color:#fff
    style WA fill:#14B8A6,stroke:#0D9488,stroke-width:2px,color:#fff
    style PA fill:#3B82F6,stroke:#2563EB,stroke-width:2px,color:#fff
    style BM fill:#14B8A6,stroke:#0D9488,stroke-width:2px,color:#fff
    style TA fill:#10B981,stroke:#059669,stroke-width:2px,color:#fff
    style BW fill:#10B981,stroke:#059669,stroke-width:2px,color:#fff
style CA fill:#10B981,stroke:#059669,stroke-width:2px,color:#fff效果:
- 关注点分离: Command 仅定义工作流
- 可重用性: Agent 和 Skill 可在多个 Command 中使用
- 可维护性: 各组件可独立修改
- 可测试性: 可按层测试
缓存策略:58% Token 节省机制
trend-analyzer 的三层缓存
trend-analyzer Skill 对 3 种类型的数据实施不同周期的缓存:
// 缓存算法(伪代码)
async function getTrendData(topic: string) {
  const cacheKey = `trend-${topic}`;
  const cached = cache.get(cacheKey);

  // 缓存命中: 有效期内
  if (cached && !isExpired(cached, 24 * 60 * 60)) {
    console.log("Cache hit: Returning cached data");
    return cached.data; // 立即返回,无 API 调用
  }

  // 缓存未命中: 需要新搜索
  console.log("Cache miss: Fetching from Brave Search");
  const data = await braveSearch(topic);
  await sleep(2000); // 遵守速率限制

  // 保存缓存
  cache.set(cacheKey, {
    data,
    timestamp: Date.now(),
    expiresAt: Date.now() + 24 * 60 * 60 * 1000,
  });

  return data;
}
缓存效果场景
场景 1: 同一天搜索多个主题
# 第一个主题(缓存未命中)
/next-post-recommendation --category ai-ml
# → 调用 Brave Search 15次
# → 耗时: 45-60秒
# → Tokens: 40,000+

# 第二个主题(缓存命中 80%)
/next-post-recommendation --category web-development
# → 调用 Brave Search 3次(仅新查询)
# → 耗时: 10-15秒
# → Tokens: 17,000 (节省 58%)
场景 2: 次日相同主题
# 24小时已过(缓存过期)
/next-post-recommendation --category ai-ml
# → 再次调用 Brave Search 15次
# → 反映最新趋势
性能对比表
| 项目 | 缓存前 | 缓存后 | 节省 |
|---|---|---|---|
| Token 使用 | 40,000+ | 17,000 | 58% |
| API 调用 | 15次 | 3次(平均) | 80% |
| 耗时 | 45-60秒 | 10-15秒 | 75% |
| 成本 | ~$0.05 | ~$0.02 | 60% |
集成工作流实战示例
示例 1: 博客文章创作 (/write-post)
完整调用链可视化:
flowchart TD
    Start([User: /write-post 'Claude Code MCP']) --> CMD{Command<br/>write-post}

    CMD --> P1[Phase 1: Research & Planning]
    P1 --> WR[Web Researcher Agent]
    WR --> TA[Trend Analyzer Skill<br/>自动发现]
    TA --> BS[Brave Search MCP]
    BS --> Sleep1[sleep 2<br/>速率限制]
    Sleep1 --> Cache1{Cache<br/>Check}
    Cache1 -->|Hit| Return1[Cached Data<br/>17K tokens]
    Cache1 -->|Miss| Search1[New Search<br/>40K+ tokens]
    Search1 --> Return1
    Return1 --> P1Done[Research Complete]

    P1Done --> P2[Phase 2: Image Generation]
    P2 --> IG[Image Generator Agent]
    IG --> Gemini[Gemini API]
    Gemini --> P2Done[Hero Image Saved]

    P2Done --> P3[Phase 3: Content Writing]
    P3 --> WA[Writing Assistant Agent]
    WA --> BW[Blog Writing Skill<br/>自动发现]
    BW --> Multi[生成3种语言文章<br/>ko, ja, en]
    Multi --> P3Done[Content Created]

    P3Done --> P4[Phase 4: Frontmatter]
    P4 --> Validate[Frontmatter 验证]
    Validate --> P4Done[Validation Pass]

    P4Done --> P5[Phase 5: Metadata]
    P5 --> PA[Post Analyzer Agent]
    PA --> CA[Content Analyzer Skill<br/>自动]
    CA --> Hash{Content<br/>Hash}
    Hash -->|Changed| Analyze[New Analysis<br/>12K tokens]
    Hash -->|Unchanged| Skip[Skip Analysis<br/>0 tokens]
    Analyze --> P5Done[Metadata Saved]
    Skip --> P5Done

    P5Done --> P6[Phase 6: Recommendations]
    P6 --> Script[generate-recommendations-v3.js]
    Script --> Sim[Similarity Calculation]
    Sim --> P6Done[Top 5 Related Posts]

    P6Done --> P7[Phase 7: Backlinks]
    P7 --> BM[Backlink Manager]
    BM --> Update[Update Related Posts]
    Update --> P7Done[Cross-links Created]

    P7Done --> P8[Phase 8: Build]
    P8 --> Check[astro check]
    Check --> Build[npm run build]
    Build --> End([Posts Published])

    style Start fill:#8B5CF6,stroke:#7C3AED,stroke-width:2px,color:#fff
    style CMD fill:#8B5CF6,stroke:#7C3AED,stroke-width:3px,color:#fff
    style WR fill:#3B82F6,stroke:#2563EB,stroke-width:2px,color:#fff
    style IG fill:#F97316,stroke:#EA580C,stroke-width:2px,color:#fff
    style WA fill:#14B8A6,stroke:#0D9488,stroke-width:2px,color:#fff
    style PA fill:#3B82F6,stroke:#2563EB,stroke-width:2px,color:#fff
    style BM fill:#14B8A6,stroke:#0D9488,stroke-width:2px,color:#fff
    style TA fill:#10B981,stroke:#059669,stroke-width:2px,color:#fff
    style BW fill:#10B981,stroke:#059669,stroke-width:2px,color:#fff
    style CA fill:#10B981,stroke:#059669,stroke-width:2px,color:#fff
    style Cache1 fill:#F59E0B,stroke:#D97706,stroke-width:2px,color:#fff
    style Return1 fill:#F59E0B,stroke:#D97706,stroke-width:2px,color:#fff
    style End fill:#10B981,stroke:#059669,stroke-width:2px,color:#fff
Token 使用量分析:
| Phase | 主要任务 | Token 使用 | 优化 |
|---|---|---|---|
| Phase 1 | 网络研究 | 17,000 (缓存命中) | 节省 58% |
| Phase 3 | 内容写作 | 15,000 | - |
| Phase 5 | 元数据 | 12,000 (增量处理) | 节省 70% |
| Phase 6 | 推荐生成 | 3,000 (基于元数据) | 节省 60% |
| 合计 | 47,000 | 平均节省 63% |
示例 2: 元数据和推荐流水线
graph TD
    Posts[Blog Posts<br/>ko/ja/en] --> Analyze[analyze-posts<br/>Command]
    Analyze --> Meta[post-metadata.json]
    Meta --> GenRec[generate-recommendations<br/>Command]
    GenRec --> RecJSON[recommendations.json<br/>V2]
    GenRec --> RecV3[relatedPosts<br/>in frontmatter<br/>V3]
    RecJSON --> Component[RelatedPosts.astro<br/>Component]
    RecV3 --> Component
    Component --> Display[博客文章<br/>底部显示]

    style Posts fill:#3B82F6,stroke:#2563EB,stroke-width:2px,color:#fff
    style Analyze fill:#8B5CF6,stroke:#7C3AED,stroke-width:2px,color:#fff
    style Meta fill:#F59E0B,stroke:#D97706,stroke-width:2px,color:#fff
    style GenRec fill:#8B5CF6,stroke:#7C3AED,stroke-width:2px,color:#fff
    style RecJSON fill:#F59E0B,stroke:#D97706,stroke-width:2px,color:#fff
    style RecV3 fill:#F59E0B,stroke:#D97706,stroke-width:2px,color:#fff
    style Component fill:#10B981,stroke:#059669,stroke-width:2px,color:#fff
style Display fill:#10B981,stroke:#059669,stroke-width:2px,color:#fff数据流:
-
/analyze-posts: 仅分析韩语文章(节省 3 倍成本)
- 通过 Content Hash 检测变化
- 仅重新分析已更改的文章
- 更新 post-metadata.json
-
/generate-recommendations: 基于 LLM 的语义推荐
- 基于元数据分析(节省 60-70% tokens)
- 六维相似度计算
- V2: 生成 recommendations.json(旧版)
- V3: 直接添加到 frontmatter 的 relatedPosts(当前)
-
RelatedPosts Component: 在博客文章中显示推荐
示例 3: 基于趋势的主题推荐
利用缓存的流程:
sequenceDiagram
    participant U as User
    participant CMD as /next-post-recommendation
    participant CP as Content Planner<br/>Agent
    participant TA as Trend Analyzer<br/>Skill
    participant Cache as Cache Layer<br/>.cache/
    participant BS as Brave Search<br/>MCP

    U->>CMD: /next-post-recommendation
    CMD->>CP: 主题推荐请求
    CP->>TA: 趋势分析(自动发现)

    TA->>Cache: Cache Check (24h)

    alt Cache Hit (24h内)
        Cache-->>TA: Cached Trend Data
        Note over TA: 10-15秒<br/>17,000 tokens<br/>节省58%
    else Cache Miss (24h已过)
        TA->>BS: Brave Web Search
        Note over BS: sleep 2 (速率限制)
        BS-->>TA: Fresh Data
        TA->>Cache: Update Cache
        Note over TA: 45-60秒<br/>40,000+ tokens
    end

    TA-->>CP: 趋势数据
    CP->>CP: 内容差距分析
    CP->>CP: 生成10个主题
    CP-->>CMD: 推荐报告
    CMD-->>U: content-recommendations-{date}.md
$ARGUMENTS 使用模式
Commands 通过 $ARGUMENTS 支持灵活的参数传递。
简单模式 (analyze-posts)
/analyze-posts $ARGUMENTS

# 使用示例

/analyze-posts --force # 完全重新生成
/analyze-posts --post my-slug # 仅特定文章
/analyze-posts --verify # 验证模式
复杂模式 (write-post)
Topic: $ARGUMENTS

# 解析逻辑

topic = args[0] # 第一个参数: 主题
flags = parseFlags(args[1:]) # 其余: 标志

# 使用示例

/write-post "Claude Code MCP 集成指南" --tags ai,mcp,automation --languages ko,ja标志解析示例:
function parseArguments(args: string[]) {
  const result = {
    topic: args[0],
    tags: [],
    languages: ["ko", "ja", "en"], // 默认值
    description: "",
  };

  for (let i = 1; i < args.length; i++) {
    if (args[i] === "--tags" && args[i + 1]) {
      result.tags = args[i + 1].split(",");
      i++;
    } else if (args[i] === "--languages" && args[i + 1]) {
      result.languages = args[i + 1].split(",");
      i++;
    } else if (args[i] === "--description" && args[i + 1]) {
      result.description = args[i + 1];
      i++;
    }
  }

  return result;
}
实战应用指南
创建 Skill (分步指南)
步骤 1: 创建目录
mkdir -p .claude/skills/my-skill
cd .claude/skills/my-skill
步骤 2: 编写 SKILL.md
---
name: my-skill
description: Brief description of what this skill does. Use when [specific trigger condition].
allowed-tools: [Read, Write, Bash]
---

# My Skill

## Core Capabilities

1. **Feature 1**: Description
2. **Feature 2**: Description

## Workflow

### Phase 1: Input Processing

...

### Phase 2: Main Logic

...

### Phase 3: Output Generation

...

## Examples

...
步骤 3: 添加支持文件(可选)
# 详细指南
touch detailed-guide.md

# 脚本
mkdir scripts
touch scripts/helper.py
步骤 4: 测试
# 在与 Claude 的对话中使用触发关键词
"Please use my-skill to process this data..."
创建 Command (分步指南)
步骤 1: 创建文件
touch .claude/commands/my-command.md步骤 2: 定义工作流
# My Command

Execute [specific workflow] with [parameters].

## Usage

\`\`\`bash
/my-command $ARGUMENTS
\`\`\`

## Arguments

- \`<required>\`: Description
- \`--optional\`: Description

## Workflow

### Phase 1: Preparation

1. Parse arguments
2. Validate inputs
3. Load dependencies

### Phase 2: Execution

1. Call Agent A
2. Process results
3. Call Agent B

### Phase 3: Finalization

1. Validate outputs
2. Save results
3. Return summary

## Example

\`\`\`bash
/my-command "input" --flag value
\`\`\`

## Output

...

## Related Files

- Agent: `.claude/agents/my-agent.md`
- Skill: `.claude/skills/my-skill/SKILL.md`
步骤 3: Agent 调用模式
### Phase 2: Main Processing

Delegate to specialized agent:

\`\`\`
@my-agent "Process this data with specific instructions"
\`\`\`

The agent will:

1. Automatically discover relevant skills
2. Execute the workflow
3. Return structured results
步骤 4: 测试
# 在与 Claude 的对话中执行 Command
/my-command "test input" --verbose
性能优化技术
1. 缓存 (节省 58%)
实现方法:
interface CacheEntry {
  data: any;
  timestamp: number;
  expiresAt: number;
}

class SimpleCache {
  private cache: Map<string, CacheEntry> = new Map();

  set(key: string, data: any, ttlSeconds: number) {
    this.cache.set(key, {
      data,
      timestamp: Date.now(),
      expiresAt: Date.now() + ttlSeconds * 1000,
    });
  }

  get(key: string): any | null {
    const entry = this.cache.get(key);
    if (!entry) return null;

    if (Date.now() > entry.expiresAt) {
      this.cache.delete(key);
      return null;
    }

    return entry.data;
  }
}过期策略:
- 趋势数据: 24小时(快速变化)
- 技术文档: 7天(每周更新)
- 关键词: 48小时(中等速度)
2. 增量处理 (节省 70%)
Content Hash 实现:
import crypto from "crypto";

function calculateContentHash(content: string): string {
  return crypto.createHash("sha256").update(content).digest("hex");
}

async function incrementalAnalysis(post: BlogPost) {
  const currentHash = calculateContentHash(post.content);
  const existingMetadata = await loadMetadata(post.slug);

  // 检测变化
  if (existingMetadata?.contentHash === currentHash) {
    console.log(`Skipping ${post.slug}: No changes`);
    return existingMetadata; // 重用现有元数据
  }

  // 已更改: 需要重新分析
  console.log(`Analyzing ${post.slug}: Content changed`);
  const metadata = await analyzeContent(post);
  metadata.contentHash = currentHash;

  await saveMetadata(post.slug, metadata);
  return metadata;
}效果测量:
| 场景 | Before | After | 节省 |
|---|---|---|---|
| 新文章 1篇 | 3,000 tokens | 3,000 tokens | 0% |
| 现有13篇 + 新1篇 | 42,000 tokens | 3,000 tokens | 93% |
| 完全重新分析 (—force) | 42,000 tokens | 42,000 tokens | 0% |
| 平均 | 70% |
3. 并行执行 (预告)
将在第三部分详细介绍:
// 顺序处理(当前)
for (const post of posts) {
  await analyzePost(post); // 2分钟
}

// 并行处理(改进方案)
await Promise.all(posts.map((post) => analyzePost(post))); // 30秒(缩短70%)
最佳实践
Skills 编写
✅ SKILL.md 必需
- 建议 100 行以下(长的话分离到支持文档)
- YAML frontmatter 高完成度
✅ 清晰的 description
- 包含”Use when…”语句
- 明确触发条件
✅ 使用 allowed-tools 限制权限
- 安全: 排除不必要的工具
- 只读 Skills: 仅 [Read, Grep, Glob]
✅ Progressive Disclosure
- SKILL.md: 核心概述
- 支持文档: 详细指南
- 脚本: 执行逻辑
Commands 编写
✅ 基于 Phase 的执行
- 清晰的阶段划分
- Phase 1-8 格式
✅ Agent 委派模式
- Command 仅作为编排器
- 实际工作交给 Agent
✅ 包含验证步骤
- Phase 最后: 始终验证
- 执行 astro check, build
✅ 错误处理
- 明确前提条件
- 失败时提供恢复方法
系列下期预告
第三部分: 实战改进案例与 ROI 分析
涵盖内容:
-
并行处理实现 (缩短 70% 时间)
- Promise.all 活用
- 并发执行控制
- 错误处理
-
自动化测试 (质量保证)
- Skill 单元测试
- Command 集成测试
- CI/CD 集成
-
重试逻辑 (提高稳定性)
- 网络搜索失败恢复
- Exponential Backoff
- 部分失败处理
-
ROI 分析 (投资 vs 效果)
- 开发时间投资
- 节省成本计算
- 盈亏平衡点
-
Top 3 Quick Wins (立即可应用)
- Dry-Run 模式
- Interactive Mode
- Cost Tracking Dashboard
预期效果:
- 处理时间: 2分钟 → 30秒(缩短 75%)
- 测试覆盖率: 0% → 80%
- 稳定性: 95% → 99%
结论
在第二部分中,我们深入分析了 EffiFlow 的核心——Skills 与 Commands 的集成策略。
核心洞察:
- Skills 的自动发现: Model-Invoked 方式实现基于上下文的激活
- Commands 的编排: User-Invoked,基于 Phase 的执行,Agent 委派
- 通过缓存节省 58%: 三层缓存策略 (24h/7d/48h)
- Progressive Disclosure: 通过分层上下文最大化效率
- 元数据优先: 节省 60-70% tokens
实战应用:
/write-post: 8-Phase 完全自动化/analyze-posts: 增量处理节省 70%/next-post-recommendation: 缓存节省 58%
在第三部分中,我们将进一步改进这一架构,将处理时间缩短 75%,将测试覆盖率提高到 80%,并将稳定性提升到 99%。
EffiFlow 的创新仍在继续。下期再见!
阅读其他语言版本
- 🇰🇷 한국어
- 🇯🇵 日本語
- 🇺🇸 English
- 🇨🇳 中文(当前页面)
这篇文章有帮助吗?
您的支持能帮助我创作更好的内容。请我喝杯咖啡吧。