从零构建MCP服务器 — 使用Streamable HTTP传输实现真实AI工具
使用Python FastMCP从零构建MCP服务器的实战教程。涵盖Streamable HTTP传输配置、工具实现及Claude Code集成,基于实际操作经验分享。
关于如何_使用_ MCP服务器的文章多如牛毛,但关于如何_构建_自己的MCP服务器的实战指南却出奇地少。
官方文档是有的,但自从2025年底Streamable HTTP传输成为标准以来,许多旧版SSE(Server-Sent Events)方式的示例已经过时了一半。我第一次按照教程操作时,因为没有说明需要单独安装uvicorn,卡了很久。
这篇文章正是基于那次经历整理的,涵盖2026年当前可用的MCP服务器构建流程,重点聚焦在Streamable HTTP传输配置和Claude Code集成部分。
为什么要自己构建
正如MCP服务器工具包完整指南中介绍的,现有的公开MCP服务器已达数百个。那为什么还要自己构建呢?
内部系统集成。 没有任何公开MCP服务器了解你公司的内部JIRA、构建系统或部署流水线。
精细化权限控制。 公开服务器通常要么全部允许,要么全部禁止。如果你需要只对特定团队开放的工具,或只在特定环境下运行的命令,就必须自己构建。
复杂的组合逻辑。 当你想把多个API组合成一个统一的”工具”时,重新构建一个新服务器往往比修改现有服务器更简洁。
环境准备
# 推荐Python 3.11+
python --version

# 安装FastMCP(MCP Python SDK的高级接口)
pip install fastmcp

# Streamable HTTP传输所需的ASGI服务器
pip install uvicornFastMCP是mcp包中内置的高级API。直接使用底层Server类也是可以的,但FastMCP能覆盖大多数使用场景,且无需额外的样板代码。
第一个MCP服务器:最小化示例
# server.py
from fastmcp import FastMCP

mcp = FastMCP("my-first-server")

@mcp.tool()
def get_word_count(text: str) -> dict:
    """
    返回文本的单词数、字符数和行数。

    Args:
        text: 要分析的文本字符串
    """
    words = text.split()
    lines = text.splitlines()
    return {
        "words": len(words),
        "characters": len(text),
        "lines": len(lines),
        "avg_word_length": round(sum(len(w) for w in words) / len(words), 1) if words else 0
    }

@mcp.tool()
def format_list(items: list[str], style: str = "bullet") -> str:
    """
    将字符串列表转换为指定格式的输出。

    Args:
        items: 要格式化的字符串列表
        style: 'bullet'(默认)、'numbered' 或 'comma' 之一
    """
    if style == "numbered":
        return "\n".join(f"{i+1}. {item}" for i, item in enumerate(items))
    elif style == "comma":
        return ", ".join(items)
    else:
        return "\n".join(f"- {item}" for item in items)

if __name__ == "__main__":
    mcp.run()
这样运行的是stdio传输。直接连接Claude Desktop时这种方式可以用,但如果需要多个客户端通过网络连接,就需要Streamable HTTP了。
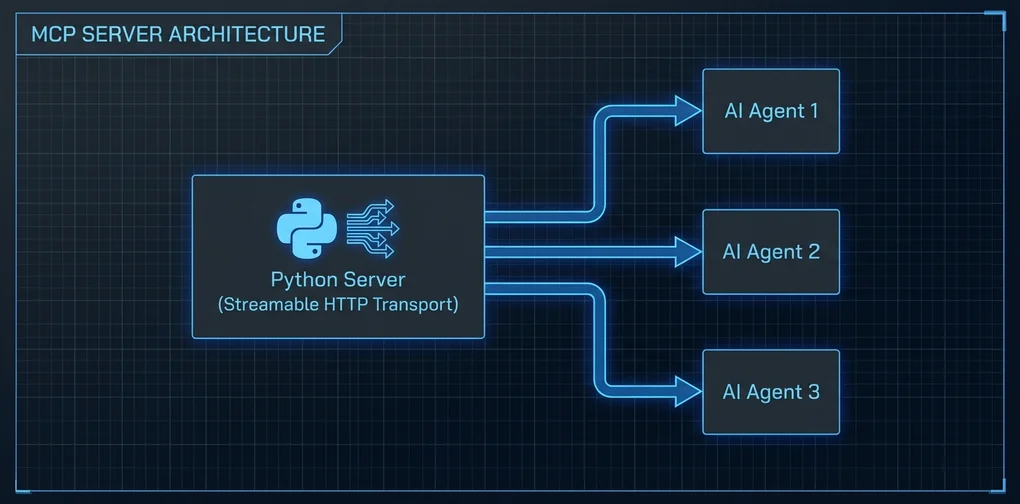
切换到Streamable HTTP传输
# server_http.py
from fastmcp import FastMCP

mcp = FastMCP("my-http-server")

@mcp.tool()
def get_word_count(text: str) -> dict:
    """返回文本统计信息。"""
    words = text.split()
    return {
        "words": len(words),
        "characters": len(text),
        "lines": len(text.splitlines())
    }

@mcp.tool()
def format_list(items: list[str], style: str = "bullet") -> str:
    """将列表转换为指定格式的字符串。"""
    if style == "numbered":
        return "\n".join(f"{i+1}. {item}" for i, item in enumerate(items))
    elif style == "comma":
        return ", ".join(items)
    return "\n".join(f"- {item}" for item in items)

if __name__ == "__main__":
    # 使用Streamable HTTP运行:默认端口8000
    mcp.run(transport="streamable-http", host="0.0.0.0", port=8000)
运行效果:
python server_http.py
# INFO:     Started server process [12345]
# INFO:     Waiting for application startup.
# INFO:     Application startup complete.
# INFO: Uvicorn running on http://0.0.0.0:8000 (Press CTRL+C to quit)默认端点是http://localhost:8000/mcp/。可以通过FastMCP()初始化时的streamable_http_path参数修改这个路径。
与Claude Code集成
在Claude Code的MCP配置文件(~/.claude/settings.json)中添加:
{
  "mcpServers": {
    "my-tools": {
      "transport": {
        "type": "streamable-http",
        "url": "http://localhost:8000/mcp/"
      }
    }
  }
}
重启Claude Code后,my-tools服务器注册的工具就可以使用了。
实际测试连接时,第一次可能会遇到CORS错误。这是因为FastMCP的默认CORS设置只允许localhost来源,解决方法如下:
from fastmcp import FastMCP

mcp = FastMCP(
    "my-http-server",
    # 仅用于开发环境的设置
    allowed_origins=["http://localhost:*"]
)
在生产环境中,用实际运行Claude Code的主机地址替换通配符。
实用工具示例:获取GitHub Issue
我最常用的模式是将外部API封装为MCP工具。以GitHub API为例:
import httpx
from fastmcp import FastMCP
import os

mcp = FastMCP("github-tools")

GITHUB_TOKEN = os.environ.get("GITHUB_TOKEN", "")

@mcp.tool()
async def get_open_issues(owner: str, repo: str, limit: int = 10) -> list[dict]:
    """
    获取GitHub仓库的开放Issue列表。

    Args:
        owner: 仓库所有者(例如:'anthropics')
        repo: 仓库名称(例如:'claude-code')
        limit: 获取的Issue数量(默认10,最多30)
    """
    limit = min(limit, 30)
    headers = {"Accept": "application/vnd.github.v3+json"}
    if GITHUB_TOKEN:
        headers["Authorization"] = f"Bearer {GITHUB_TOKEN}"

    async with httpx.AsyncClient() as client:
        resp = await client.get(
            f"https://api.github.com/repos/{owner}/{repo}/issues",
            headers=headers,
            params={"state": "open", "per_page": limit}
        )
        resp.raise_for_status()
        issues = resp.json()

    return [
        {
            "number": issue["number"],
            "title": issue["title"],
            "url": issue["html_url"],
            "labels": [l["name"] for l in issue.get("labels", [])],
            "created_at": issue["created_at"]
        }
        for issue in issues
    ]

if __name__ == "__main__":
mcp.run(transport="streamable-http", port=8000)FastMCP自动识别async def并异步处理。使用像httpx这样的异步HTTP客户端,服务器在I/O等待期间可以处理其他请求,显著提升性能。
在Claude Code中,输入”显示anthropics/claude-code仓库最新的10个开放Issue”,AI会自动调用get_open_issues("anthropics", "claude-code", 10)。
添加资源(Resource)
除了工具(Tool),还可以定义资源(Resource)——用于向AI提供静态或半静态数据:
@mcp.resource("config://app-settings")
def get_app_settings() -> str:
    """返回应用配置信息。"""
    return """
    环境: production
    API版本: v2
    允许的模型: claude-opus-4, claude-sonnet-4
    最大Token数: 100000
    """
资源与工具不同,是AI可以”读取”的上下文数据,而非执行操作的工具。
生产环境注意事项
坦率地说,将Streamable HTTP MCP服务器部署到生产环境仍需谨慎。
正如MCP安全危机 — 60天30个CVE中所讨论的,MCP生态系统在安全方面尚未成熟。自建服务器时需要特别注意:
未实现认证的风险: FastMCP默认配置没有认证。仅在内部网络使用尚可,但若暴露在公网,必须添加API密钥或OAuth验证:
from fastmcp import FastMCP
from fastmcp.server.auth import BearerAuthProvider

auth = BearerAuthProvider(
    public_key="...",  # JWT验证用公钥
    issuer="https://auth.yourcompany.com"
)
mcp = FastMCP("secure-server", auth=auth)
输入验证: 不要将用户输入直接传递给系统命令或原始查询。使用Pydantic模型强制类型约束,可以获得基本的输入验证。
日志记录: 必须记录哪个AI智能体在何时调用了哪个工具。正如MCP Gateway — 谁在控制AI智能体的工具调用中所说,智能体流量监控是生产环境的必要条件。
本地测试方法
mcp CLI是验证服务器运行状态的最快方式:
# 安装mcp CLI
pip install "mcp[cli]"

# 在浏览器中打开Inspector UI
mcp inspector server_http.py
mcp inspector提供Web UI,可以查看已注册的工具列表,并直接输入参数进行测试。在接入Claude Code之前,这是验证服务器逻辑的好工具。
小结
从零开始构建MCP服务器,你会发现”比想象中简单”。借助FastMCP,用几个装饰器注册工具并以Streamable HTTP方式启动,30分钟内就能完成。
真正的难点不在于服务器本身,而在于工具设计:如何写清楚参数类型和docstring让AI不会误用,如何以AI能理解的形式返回错误,如何保持每个工具职责单一而不是塞入所有功能——这才是真正需要思考的地方。
官方MCP Python SDK仓库(github.com/modelcontextprotocol/python-sdk)有丰富的示例,建议先把本文的代码跑通,再去参考那里的示例深入学习。
阅读其他语言版本
- 🇰🇷 한국어
- 🇯🇵 日本語
- 🇺🇸 English
- 🇨🇳 中文(当前页面)
这篇文章有帮助吗?
您的支持能帮助我创作更好的内容。请我喝杯咖啡吧。